Monday, March 25, 2013

Spring Flowers


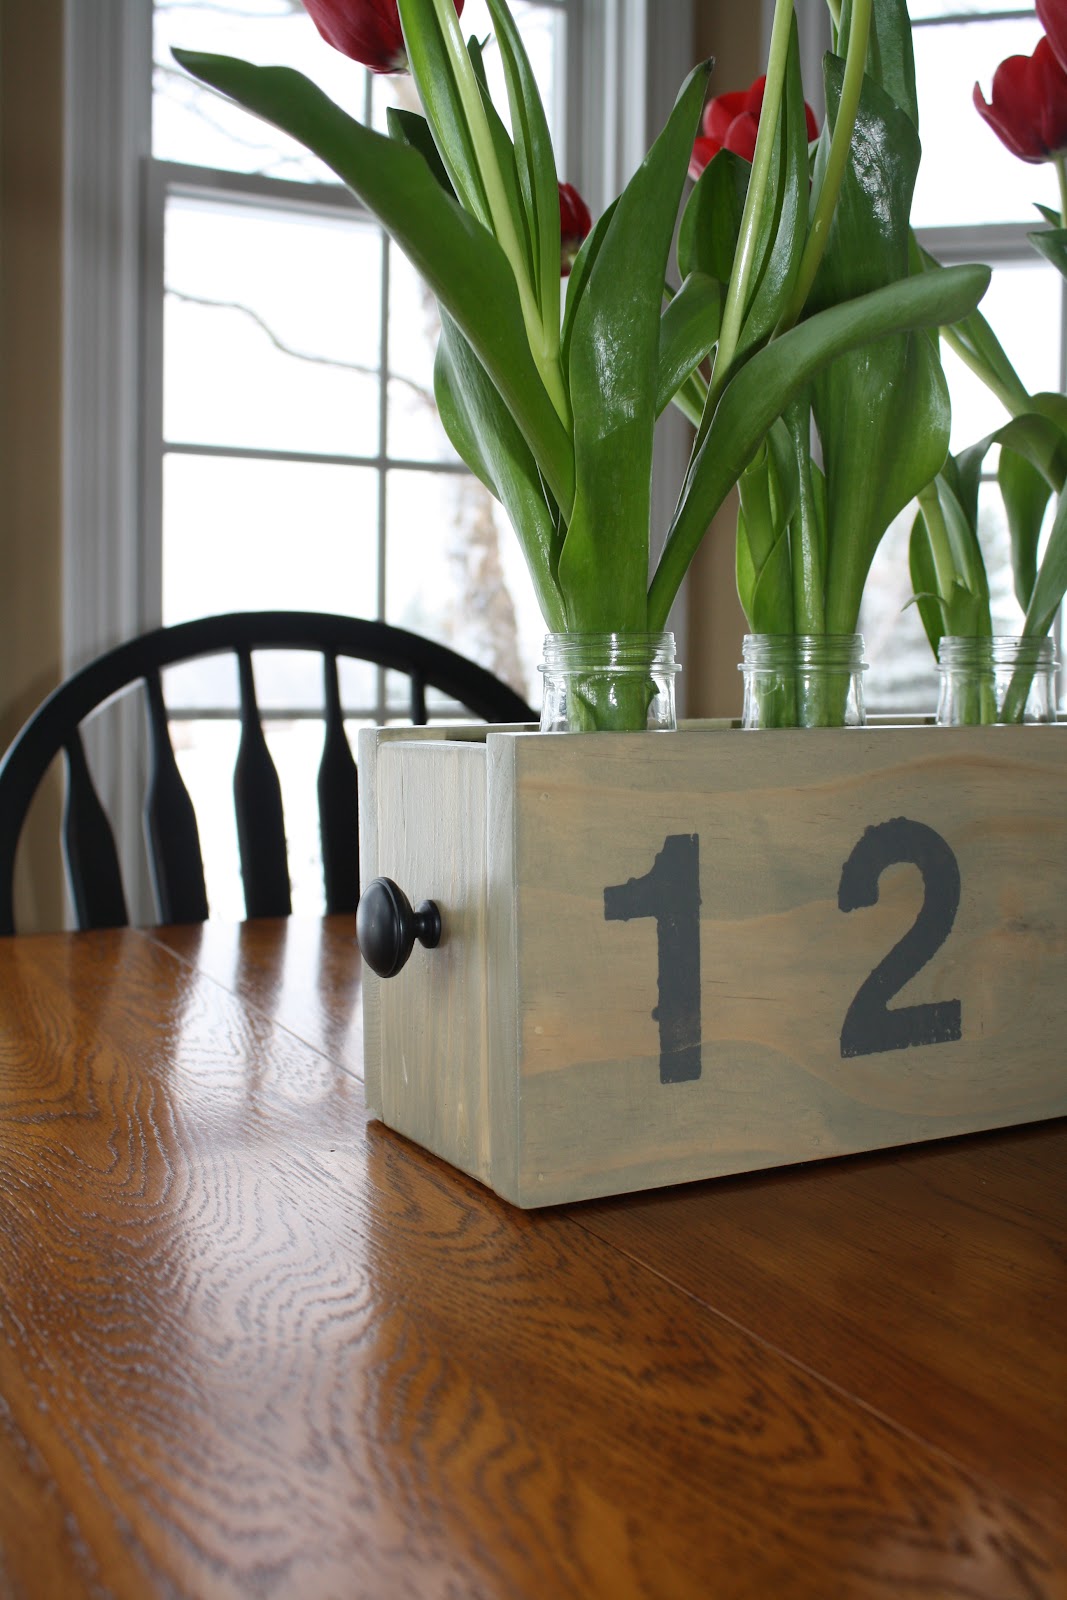
Even though the weather outside is snowy and cold we have a little bit of spring in the kitchen!!
 
I made a box out of scraps of wood in the garage, stained it with paint diluted with water and recycled some Starbucks Frappuccino bottles to create a little flower box in the house.  A $5 bouquet of tulips from the grocery and I can feel the warmth of Spring heading our way!!!


Sunday, March 17, 2013

I was Featured!!!

The art Sam & I created last week was featured today on a fantastic blog called Knock Off Decor!
Check it out!

Monday, March 11, 2013

Snow Day Fun!


What to do on a snow day with a pile of scrap wood?
Sam had a snow day last week and as always I was itching to do something in the garage but it was kinda cold and we had about 4" of snow on the ground.  I have turned my ping pong table into a indoor work space so ....
We started with this:


Using a chart we made on graph paper, my miter saw and sander in the garage we made this:


We moved to the basement to create the puzzel.


Again using our chart we painted each piece using leftover paint from around the house and other projects and we had this:

 
 We took our painted boards and glued them to a piece of plywood, let them dry, then sanded and added nails. This is the finished piece:


Our inspiration came from this Pottery Barn Wall Decor:

Pottery Barn 50" x 50" $399.00

 
Art by Sam & Gretchen 30" x 30" $10 (for a piece of plywood)!!!
AND
We had a fun day doing it!!
We think it will grace the wall in Sam's bedroom or the game room!

Monday, March 4, 2013

Almost Done!

I have been working on my LL Family Room all winter and I have everything finished except for painting the walls!  This was a great project for the winter because it has been too cold to paint outside but I was able to paint in the basement since that's where the furniture was going anyway!  Here is a list of everything I did:

1) Sold Furniture
2) Bought a new chair and sectional from Pottery Barn
3) Moved plaid chair and ottoman from upstairs to downstairs
3) Made and finished a coffee table
4) Refinished two side tables to match the coffee table
5) Made a tray for the coffee table and a chalk board for the wall - both painted red
6) Redid most of my accessories

 
By making the LL Bedroom into a game room I was able to eliminate lots of clutter from the family room - Doug says it looks like a grown up room now! I am very pleased with the way everything turned out.  Now just have to have the walls painted or do it myself :)  I am not sure what color they are now but they are very gold so I am leaning toward Sherwin Williams "Latte".
 
BEFORE


AFTER


Sunday, February 17, 2013

Communion Tables


My daughter and son-in-law's church needed some tables to use for communion.  They had been using plastic folding tables and wanted something more permanent and solid.  I made two small farmhouse tables.  They measure 24" x 48" and are painted with Sherwin Williams "black bean" on the bottom and the tops are stained with Minwax "English Chestnut".  Everything is finished with Minwax Polycrylic.


I will update with some pictures at their church when they take some - hint hint!!

Game Room


Work on my lower level family room and game room continues!  I wanted to keep one bed in the lower level game room so I made a day bed.  It is huge!  I got carried away and made it taller than I should have so we used both the box spring and mattress so it didn't feel like you were sitting in a box :)

I wish I had made the back one board shorter and the sides two boards shorter - but it still looks cute!
This was my first attempt at using Minwax water based tintable stain and I like it!  I used Minwax Polycrylic to finish it.


So the room is almost finished - some framed posters on the walls and a tray for the ottoman should finish it up!

Saturday, January 12, 2013

TV Stand


Hi everyone!  I have been working hard in the garage this week building a few things.  One piece I finished today is a TV stand to use in the lower level of my house.  I have decided to turn a never used guest room down there into a video game room!  This will allow me to make the family room less cluttered - I have ordered some new furniture so I am excited to make the family room something more than a place for the "old" furniture!

Back to the TV stand.  I decided to make it fun since it is for a game room so I painted it red, distressed it and rubbed it with English Chestnut Stain.  The top and shelves are stained with the English Chestnut and finished with Minwax Polycrylic.  The best part about the TV stand -  it is made from wood I already had in the garage and I got to use my new router!!  Isn't that finished edge nice?

 
I found the perfect brown bins at Target - On Sale!


I also used my router to put a nice rounded edge on the shelves.


I made it to fit this "old" style but functional TV!
Now just need to add the game systems!


I have another big project almost done so I hope to post about it next week!
Next project for this room is a daybed - can't wait!
 
Thanks for stopping by.